 
|
|
|
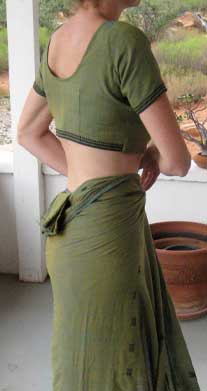
 The delightful Tamil Pinkosu
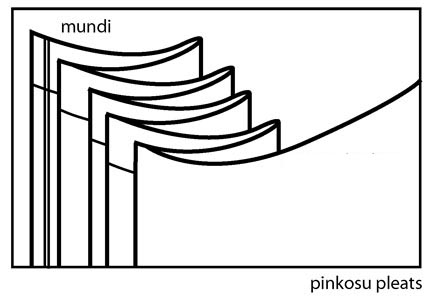
|
The pleats are formed towards you. The start end should be on the left and the first fold on the right. The last pleat has the remaining length of the sari going back towards the right. |
This is the kind of tricky sari yoga part we love!
|
 |
 |
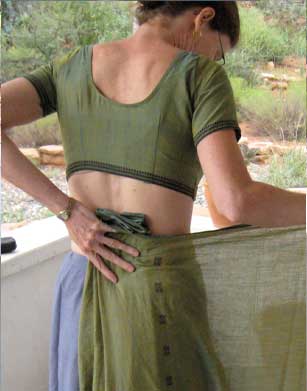
Place the pleat bundle on your center back waist with the first pleat facing your body and the remaining sari wrapping toward your right hip. Lift the pleats up about 4-6" over your waistline and hold them there with your left hand. Or you could tuck them into your choli to give you two free hands. With your right hand bring the rest of the sari around, wrapping counterclockwise across your front, over the left hip and back around, wrapping the sari over the pleat. If you are holding the pleats with your left hand you can grasp the top border also with your left hand. Continue wrapping around over the right hip again.
Once you have the sari securely wrapped around to the right hip again, you can let the pleats go. They will flop over the top border towards the outside and be held by it - as long as you maintain a taughtness of the top border in your right hand. Just keep the tension and the pleats won't go anywhere.
|
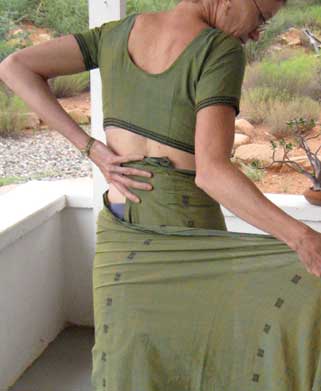
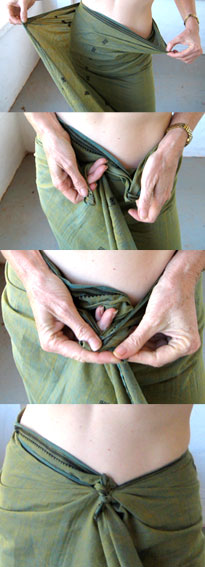
The knot is formed by pinching a length of top border with the right and left hands and knotting them snugly at the belly button. Chantal Boulanger calls this the "thumb knot" You might have to add a little slack to the wrapping around the body to get enough upper border length to make a knot. Use as little slack as possible to save length, but generally enough to maintain a straight grain falling down to the lower border. 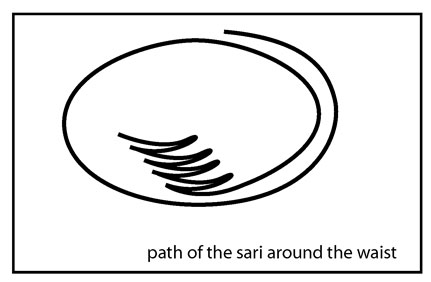 This diagram illustrates the path of the sari around the waist. The pleats will flop over the layer above them and be reversed. The knot is formed between the cloth on the first and second layers on the right and left of the navel. |
 |
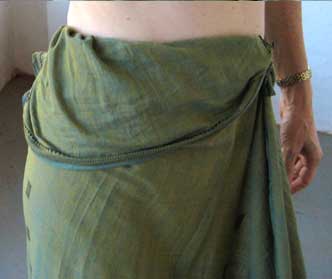 |
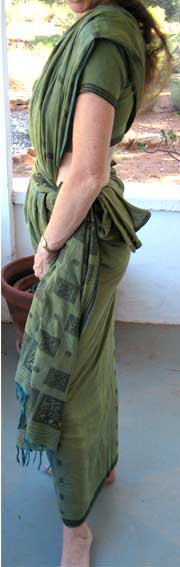
At the knot you will have two layers of cloth to the right. The first pass around the body is the first layer. Pull it up and fold it to the outside, it can be adjusted in length to make a smooth arc from the navel to the bottom of the first pleat.
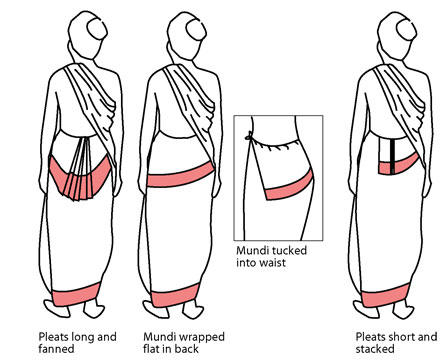 |
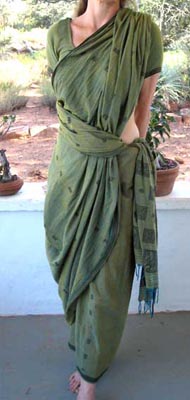
The pleats can be fanned out or arranged evenly around the waist. Drawing the mundi out of the pleat bundle and tucking neatly into the waist looks cute too. If you want to drape the pleats even longer begin your wrap by holding them up in your left armpit when you start the drape, keeping the upper border at the waistline so that you will have a nice long pleat. The drawing of the mundi tucked to the waist is a 3/4 view of the left hip. The mundi can be drawn all the way out of the pleat bundle and tucked in regularly around from back to the center front knot. |
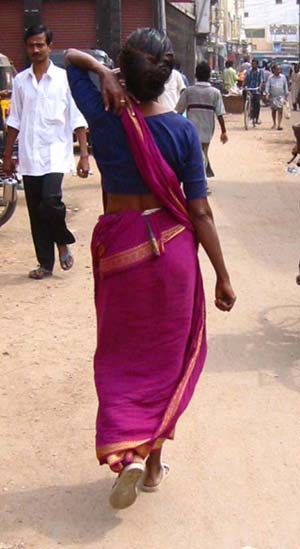
If you need to work in the fields or walk fast you can hike up the cloth over your left thigh by grasping the cloth at your hip or upper thigh and tucking that in at the waist. it causes a bit of a flounce in the front so that there is more room for a longer stride. It also reveals the stack of pleats below in back which can look really great. A little bit of this helps a lot with the walkability of this drape.
|
 |
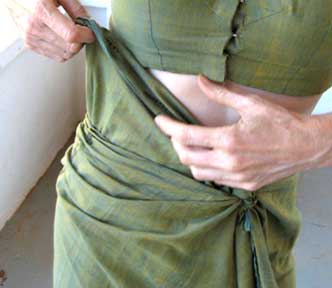
The top border coming out of the knot on the left is now thrown over the left shoulder. Draw the top border rising up on your right a few inches from the knot and tuck it into the back waist on the right side. Pull out just enough cloth to obscure your right breast and hold securely in the waistline. A small knot helps at that point as it help it stay in place. The lower border is adjusted so that it makes a nice straight line hanging down from the left shoulder to the floor. |
 |
 |
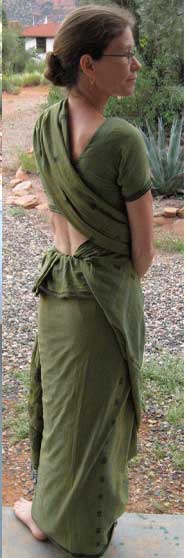 |
The pallu can be draped just about any way you want. If you are not wearing a petticoat you can obscure more of your bottom by folding the pallu in half at the end and draping it around in front of your torso and tucking it in at the left hip. I like the look of twisting the remaining pallu where it drapes down from the left shoulder and carrying the twisted rope of sari around the right waist and across the front, tucking it in casually at the left hip and letting the remaining sari hang straight down. |
|
A Gallery of sari drapes is available for your inspiration. |
All images and text © Sarisafari
|
Sitemap How to drape a sari Sari facts and fun Collection Overview |

|