 
|
|
Kachha Style for 6 yard sari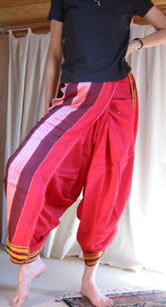
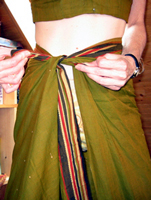
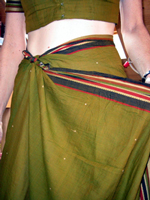
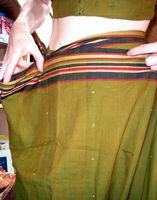
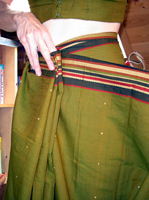
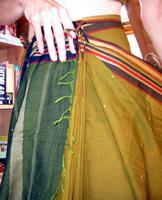
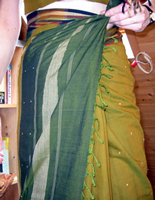
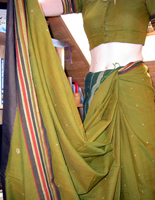
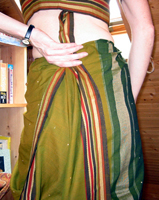
This style looks great with classic handlooms with wide borders and traditional striped pallu! Lighter fabrics work better for this style as there are many small pleats in the front. It is a modification of the traditional 9 yard sari worn in Maharasthra. With 9 yards you'd just drape the pallu as in the Nivi style over the left shoulder. This sari wrap is worn without petticoat, as the sari border will be passed between the legs and tucked in the back waist to form a sort of pants look. You should have between 10 - 15 narrow pleats in front, the center of which is drawn back through the legs and tucked into the rear waist. Forming the Waist Wrap the sari starting from your left hip. Wrap towards the right and draw the sari around your waist. Tie the sari onto the waist by taking up a couple inches of border fabric in your left hand at the point where it meets the sari end and tie them together to form a snug waist just under your belly button.
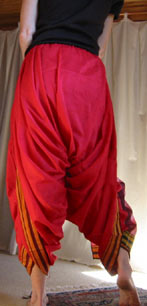
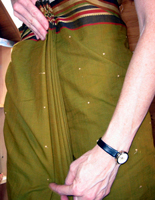
Straighten the pleats and press them flat with your hands. Tuck them in the waist snugly. You can fold the pallu into the waist a little higher than the pleats to keep the bottom borders level.
You can use a mirror when you're draping to make sure the legs are evenly draped and that the borders are lined up. If you are tall the calves will be exposed. It is better to wrap this a bit tighter than looser as it is easy to get your feet caught in the other leg when movin and bending! Trust me, I have learned this the hard way! Love these sarees? The red one is an Ilkal sari from Maharastra and the green is a Coimbatore cotton saree from Tamil Nadu. Check out the sarishop for a great selection of these pieces. For sarees with heavy ornamental pallus the ancient Fishtail sari is yet another variation in the huge realm of possibilities that a long piece of unstitched cloth offers to your imagination. Read about how to drape the Fishtail style and the Vijaynagara drape on this informative website.
All images and text © Sarisafari |
|
Sitemap How to drape a sari Sari facts and fun Collection Overview |

|